How to add mods to server
Before you follow the next steps about adding mods to your server, there are some things to keep in mind.
If you have played on your server and made some progress, you should always create a backup. Backup will help you come back to an old version of your server in case some mods don’t work and cause your server not to start properly.
After installing/uninstalling several mods on your server, there could be a potential issue where the server won’t start if you previously had some mod and then uninstalled it. So be careful what mod you proceed to install/uninstall
Downloading/Installing Mods
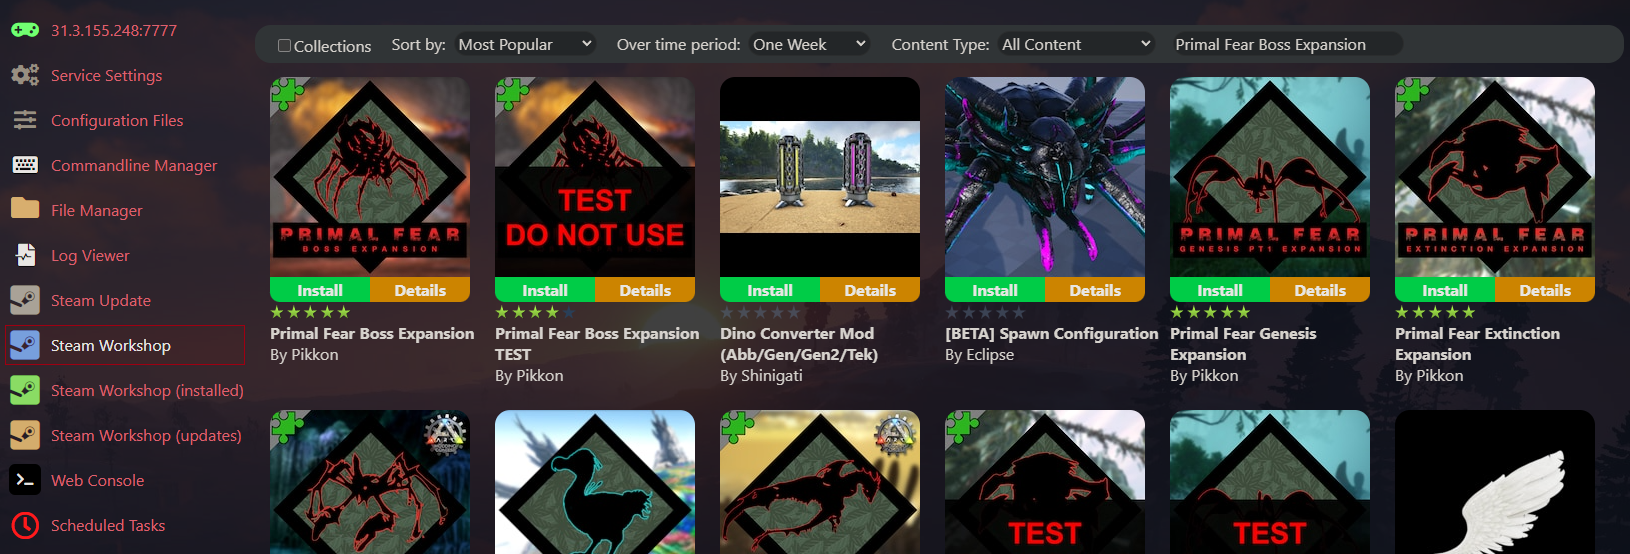
First step in this process is downloading mods on your server. If you go to a game panel and select your service, you will see a list of tabs that represent different controls of the server. We are currently looking for mods, so head out to Steam Workshop.
You are now seeing a section with all the mods from Steam Workshop. To find a mod you want to install on the server, you can type it in a search box. After you found a mod you wanted, simply press on Install and the installation of the mod on your server will be issued. Depending on the mod size, it can take some time until the mod is installed, so we kindly ask you for a bit of patience.
Example:
INFO
After every installation of a mod, it will appear in Steam Workshop (installed) section.
Enabling Mods On The Server
After installing the mods and before enabling the mods that are mentioned further in the text, make sure you either select the predefined custom commandline (Default + Mod Manager) or create a custom commandline and make sure that “Auto Managed Mods” option is enabled.
This is done under the Commandline Manager on the gamepanel.
So installations of the mods are finished and you still don’t see them in game? Well, there is a reason why this is happening. Every mod you install is not automatically enabled on your server, and you will have to do it manually.
To do this, first go to your game panel and select Configuration Files section.
You will be displayed a list of the configuration files on your server. You are currently interested in a file named GameUserSettings.ini. On the right from the name you can see a button that says Text Editor, press it and the file will be opened.
Find the line where it says ActiveMods. You will need to edit this now to be sure you are doing this correctly, please follow next steps.
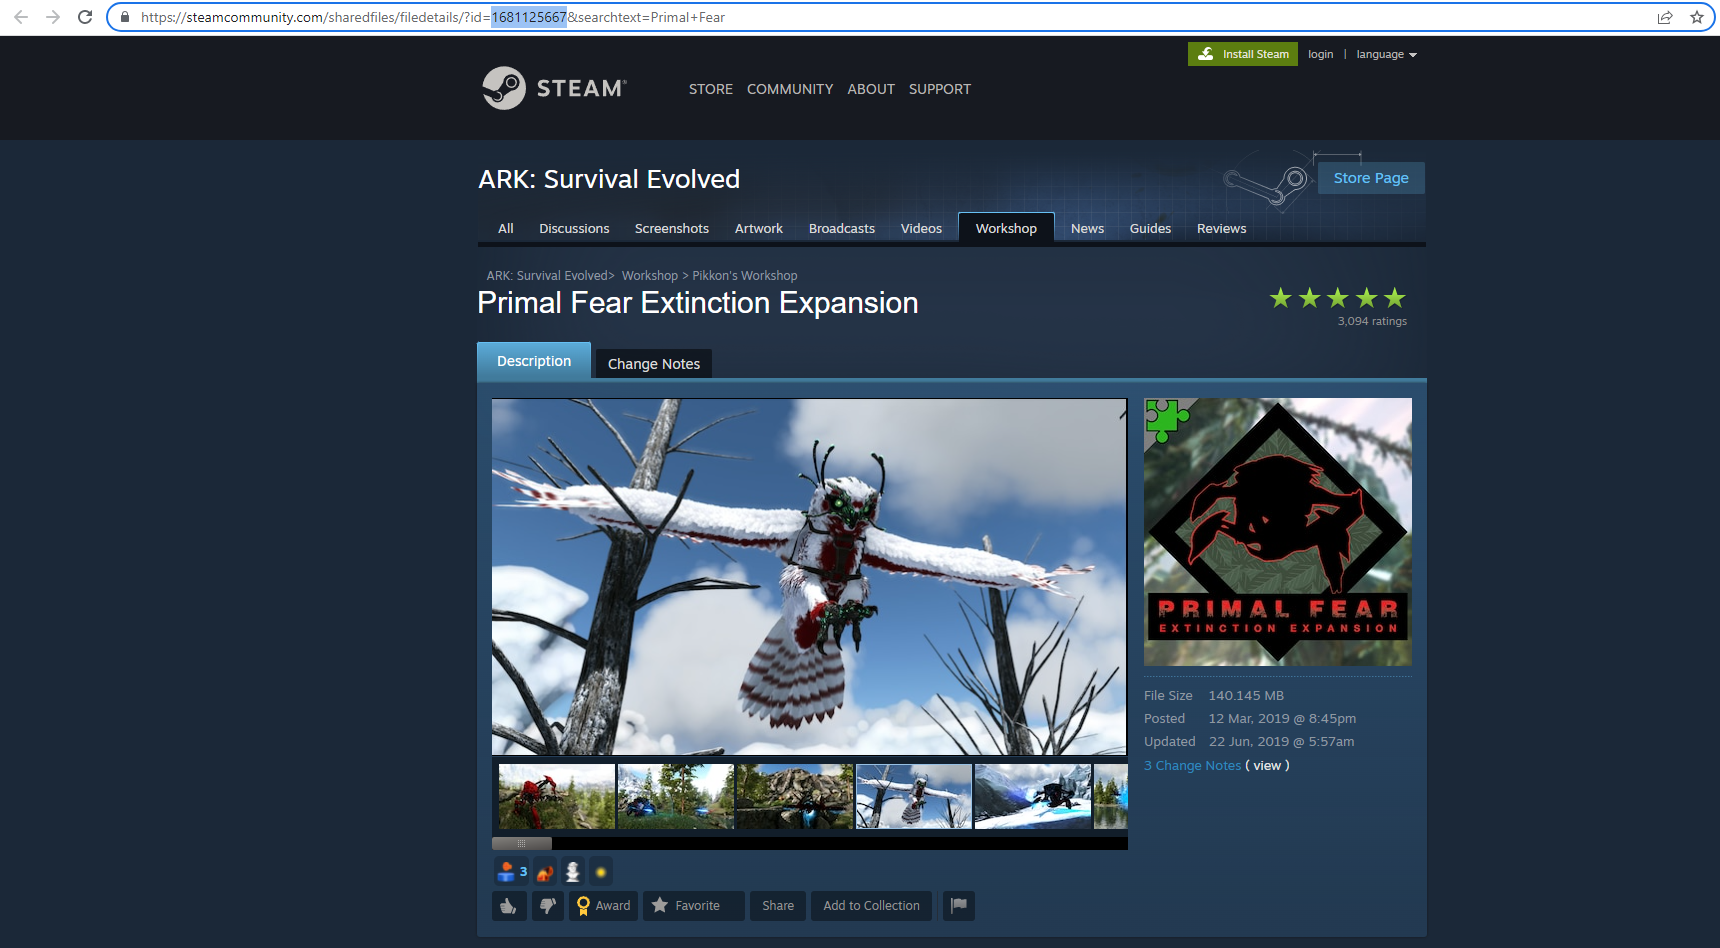
Here in this line you will need to find ID’s of the mods you installed, so to do this you now need to go to Steam Workshop (installed) section and press on Details for every mod you want to enable.
You have been redirected to the official Steam Workshop page, and you can see the mod you installed. In the URL of that page you will see the following number as shown on this screenshot
Now you go back to the game panel where you are editing GameUserSettings.ini file and in the line of ActiveMods you add the following ID. Each ID should be separated by comma (,).
Example:
ActiveMods=839162288,1681125667,1315573129
INFO
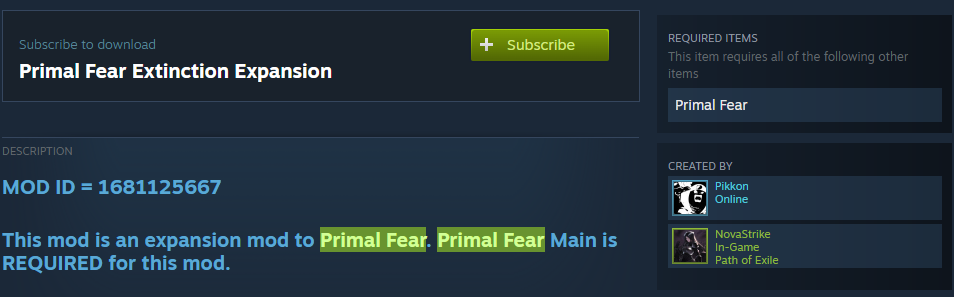
Some mods have dependencies, which means that they need another mod in order for it to work, so before you write the ID in ActiveMods please check if there is a Required Mods section on Steam Workshop. In case there is a required mod, be sure to install it first and add it in ActiveMods line before the one you wanted earlier.